Pages customization service
Overview#
Attention: as the customizations involve CSS and JavaScript files, depending on the customization level it's recommended that, besides a designer/UX specialist (user experience), a front-end developer should also be involved or someone with similar JavaScript knowledge. Both will work together to create the required artifacts for customization.
Important: every content used for customization (be them images, JS scripts, CSS files, etc) are of unique and exclusive responsibility of the client performing the customization. Software Express is not responsible for any irregularities in these contents, it's up to the client performing the customization to assure that these contents are being used in accordance with their respective licenses, if there are any.
Currently it's possible to customize the pages in two ways: using a CSS file or a JS code file. It's also possible to use both methods together.
The personalization via style sheets is done by the customV2.css file (generic name given to the style sheet), following some patterns that override the current style.css (default Software Express style sheet).
Although
style.cssis the main CSS file of the HTML payment interface, there are other CSS files that can be referenced. These files are mentioned in the next section.
The personalization via JavaScript is done by the main.js and end.js files (generic names), that will be inserted in the pages.
The customV2.css style sheet and the main.js and end.js source codes are unique for each client and the "installation" is applied by Software Express.
When the virtual store (assuming as an example Carat Portal's homologation environment) redirects the customer to the page [https://esitef-homologacao.softwareexpress.com.br/e-sitef-hml/do.se?input['nit']=XX](https:// esitef-homologacao.softwareexpress.com.br/e-sitef-hml/do.se?input['nit']=XX), Carat Portal loads the .css and .js files as registered for the merchant in a directory, for example:
https://esitef-homologacao.softwareexpress.com.br/custom/xxx/
Where xxx is the directory configured on Carat Portal's back-office (the merchant id on Carat Portal is used), that has the following structure:
Therefore, the path to the images for the merchant is [https://esitef-homologacao.softwareexpress.com.br/custom/xxx/images](https:// esitef-homologacao.softwareexpress.com.br/custom/xxx/images), and the images must point to something like background-image:url('/custom/xxx/images/botao.gif') in the customV2.css file.
The customV2.css file can override the properties contained in style.css, but won't replace the style.css file. Thus, the page will also point to a new /custom/xxx/css/customV2.css file, as in the HTML snippet below:
The main.js file is inserted in the pages right before the </body> closing tag, as in the example below:
Then, it will be executed after loading the page elements and will have reference to all of them.
The end.js file is inserted only in the last page, being useful to execute some code in the store return redirecting. The insertion is done as follows:
It's worth noting that not every style is customizable, only the colors, background images and buttons.
Eventual images can also be sent, but are subject to our approval concerning the size (bytes) and the format.
It's not allowed to remove Carat Portal's logo, both superior (header) and inferior (footer, if any). The merchant will be able to put their logo in another position of the page, provided that it doesn't remove or override the Carat Portal's logos.
The client can take as an example the css on:
https://esitef-homologacao.softwareexpress.com.br/custom/exemplo/css/customV2.css
Attention: Never use the IP instead of the esitef-homologacao.softwareexpress.com.br (Homologation) and esitef.softwareexpress.com.br (Production) domains. The IP can change at any moment and without previous warning, therefore, it's important to use the domain for accessing Carat Portal.
Procedures for sending the customization files#
The customization files, be them customV2.css and the images, and/or the main.js and end.js files, must be delivered to Software Express formatted as follows: xxx.zip, where: xxx is the merchant id on Carat Portal, respecting the following structure:
The CSS files of reference for the HTML interface are available on the homologation environment on:
- https://esitef-homologacao.softwareexpress.com.br/css/v2/authentication.css
- https://esitef-homologacao.softwareexpress.com.br/css/v2/bootstrap.min.css
- https://esitef-homologacao.softwareexpress.com.br/css/v2/error.css
- https://esitef-homologacao.softwareexpress.com.br/css/v2/fonts.css
- https://esitef-homologacao.softwareexpress.com.br/css/v2/payment-credit.css
- https://esitef-homologacao.softwareexpress.com.br/css/v2/payment.css
- https://esitef-homologacao.softwareexpress.com.br/css/v2/recharge.css
- https://esitef-homologacao.softwareexpress.com.br/css/v2/style.css
- https://esitef-homologacao.softwareexpress.com.br/css/v2/success.css
Send only the files related to the personalization that will be used! If only the style personalization is desired, send only the customV2.css and the image files.
The image files must be preferably in the JPG and PNG format. The final layout will always be subject to approval by Software Express.
If the establishment has more than one merchantId#
For companies that have more than one merchantId (store identification on Carat Portal) and wish to use the same customization, please contact our support.
Customizing the logo#
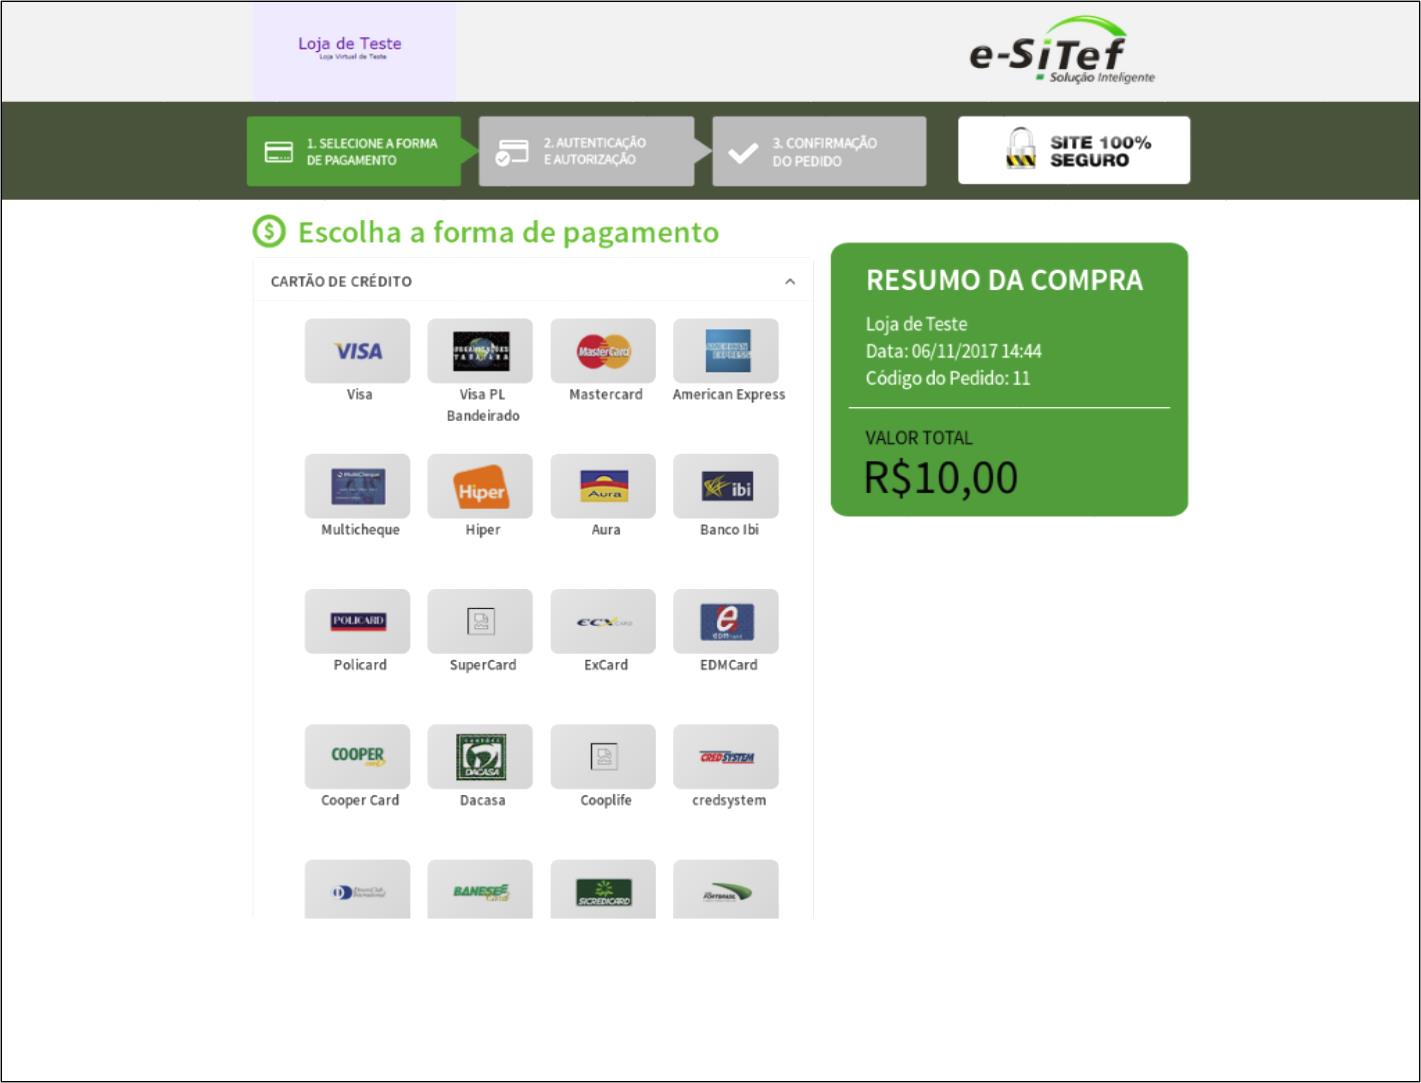
It's also possible to insert a personalized logo of the store on the payment screen. If the logo is inserted, it will appear at the top of the page, to the left from Carat Portal's logo. Below is an example illustration:

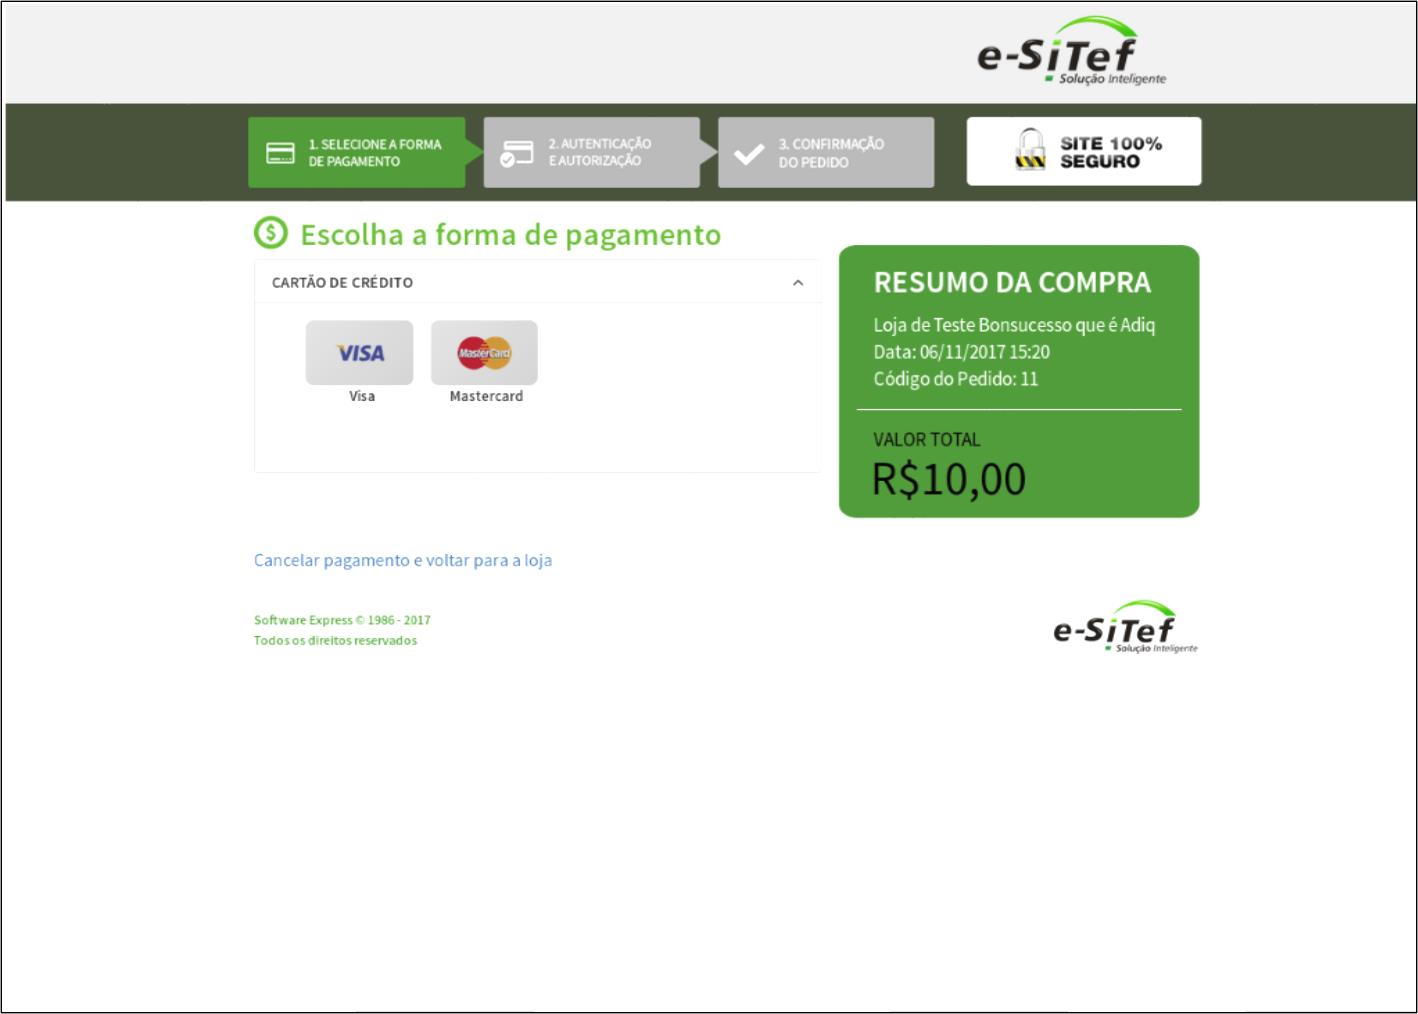
If the logo isn't inserted, only Carat Portal's logo will appear at the top right and the rest of the top will be of only one color. Below is an example illustration:

So that the customized logo is shown, the client must create a figure with a resolution of 320 x 160 pixels, in PNG format, with transparent background. The image must be passed to the Production and Support teams of Carat Portal.
Then, the option of displaying the personalized logo must be enabled on the merchant's registration by the Production and Support teams of Carat Portal.
Customization examples#
To practice the presented concepts, a customization example will be shown next.
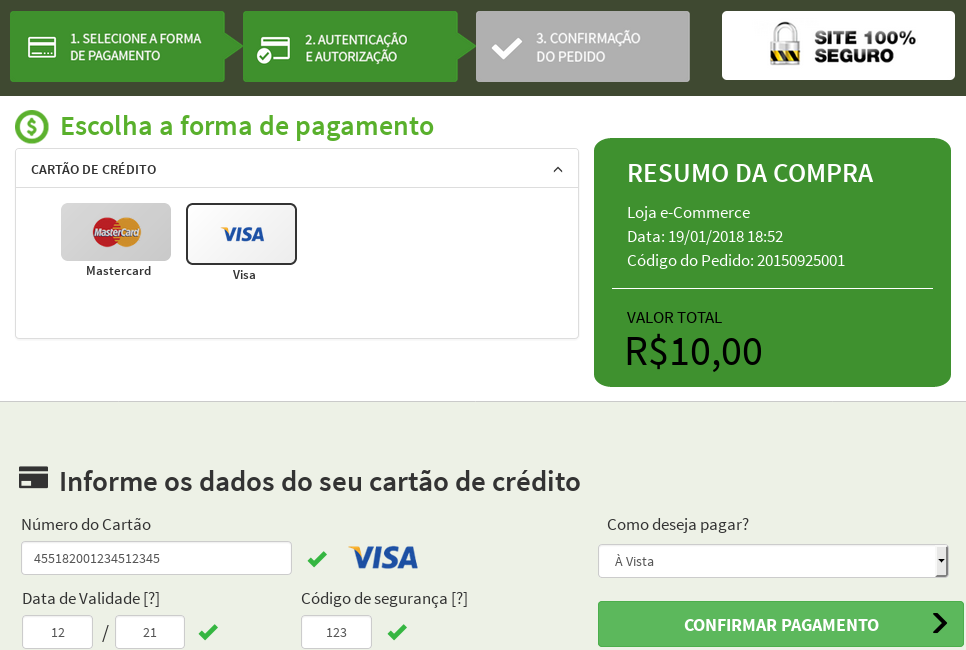
The figure below displays the default payment page, without any customizations:

Four elements of the page will be customized:
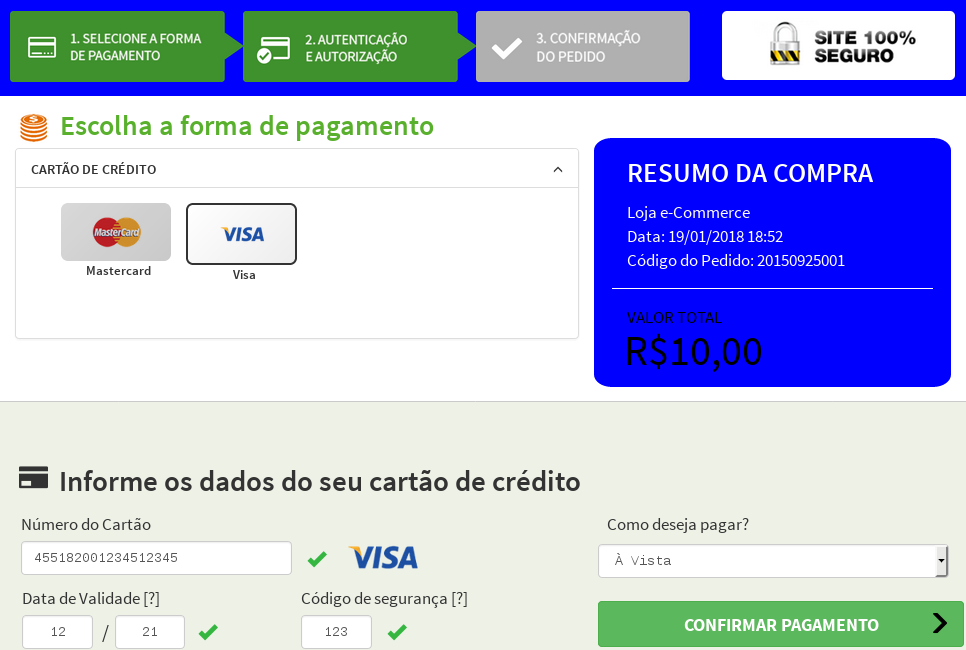
- Background color of the payment breadcrumb bar, at the of the page (CSS): from dark green to blue.
- Background color of the "RESUMO DA COMPRA" frame (CSS): from green to blue.
- Font of the labels "Número do Cartão", "Data de Validade [?]", "Código de segurança [?]" and "Como deseja pagar?" (CSS): from Source Sans Pro to Courier New.
- Icon "$" beside the "Escolha a forma de pagamento" label (JavaScript): replacement of the icon for another.
The first step of the customization is building the directory structure mentioned previously. Assuming that the merchant of this example has the ecommerce code, we must have the following structure:
Initially, tje customV2.css and main.js files must be empty. The cifrao.png file can be seen in the figure below:
The customV2.css file will contain the customizations of the items 1, 2 and 3. The cifrao.png and main.js files will be used on the customization of the item 4.
To customize the item 1, add the following content to the customV2.css file:
There, we alter the elements background color with the steps style (item 1) to the blue color (code 0000ff).
To customize the item 2, add the following content to the customV2.css file:
There, we alter the elements background color with the summary style (item 2) to the blue color (code 0000ff).
To customize the item 3, add the following content to the customV2.css file:
There, we alter the elements font with the form-control style (item 3) to Courier New.
All of these customizations obey the CSS (Cascading Style Sheets) language conventions. The complete customV2.css file can be seen below:
The customization of the item 4, as opposed to the other three items, can't be performed via CSS, making it necessary to use the JavaScript language.
To customize the item 4, add the following content to the main.js file:
There, we alter the image of the elements that meet the criteria above (item 4) to the image contained in the cifrao.png file.
It's important to mention that the JavaScript code above is using the jQuery framework (https://jquery.com), but any valid JavaScript source code can be used.
With the customization complete, the directory structure must be compressed in a file called ecommerce.zip and send to Software Express, as in the instructions mentioned previously. After Software Express validates the customization, if no problem is detected it will be available for visualization.
The figure below shows the payment page after the customization:
