User Administration
If your user has the necessary permissions (provided by the Software Express operation team), you can register, list and change users.
User registration#
To access the new users registration screen, follow the steps below:
- Click on Registration:

- In the following displayed submenu, click on Users:

- In the new submenu, click on New User:

Com isso, a seguinte página será exibida:
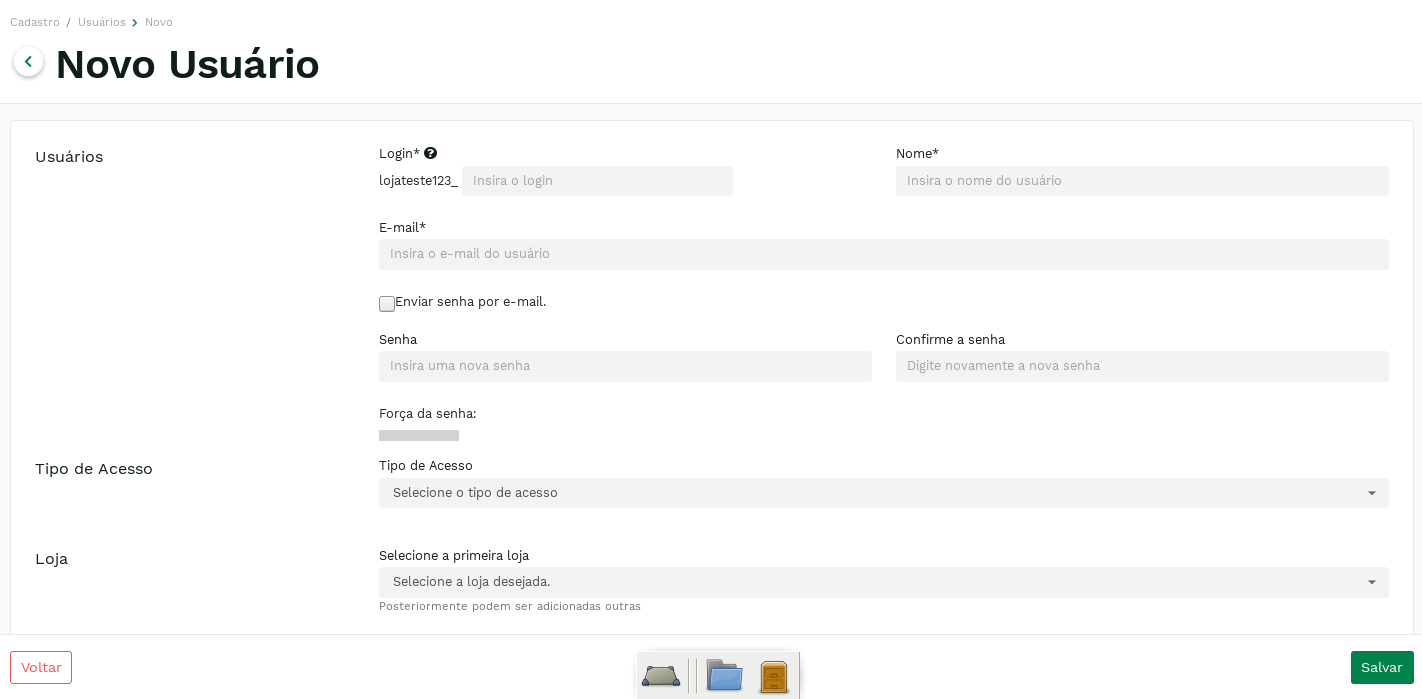
All fields on this form are required. Below is the description of each of them:
- Login: name that will be used to access the Store Web Portal. This login is added with a specific prefix for the store that makes the registration.
- Name: username.
- Email: user's email address.
- Password: User password to be used to access the Store Web Portal. When entering the password, the page will display its strength below, that is, how secure the password is.
- Password Confirmation: enter the user's password again. This procedure is important to avoid errors in password registration.
attention:
The login prefix is registered by Software Express. If you want to change it, it is necessary to contact the activation team. The modification of the prefix will not change the users that already exist in the Store Web Portal.
The figure below illustrates the filling in of the fields listed so far, as well as the indication of password strength:
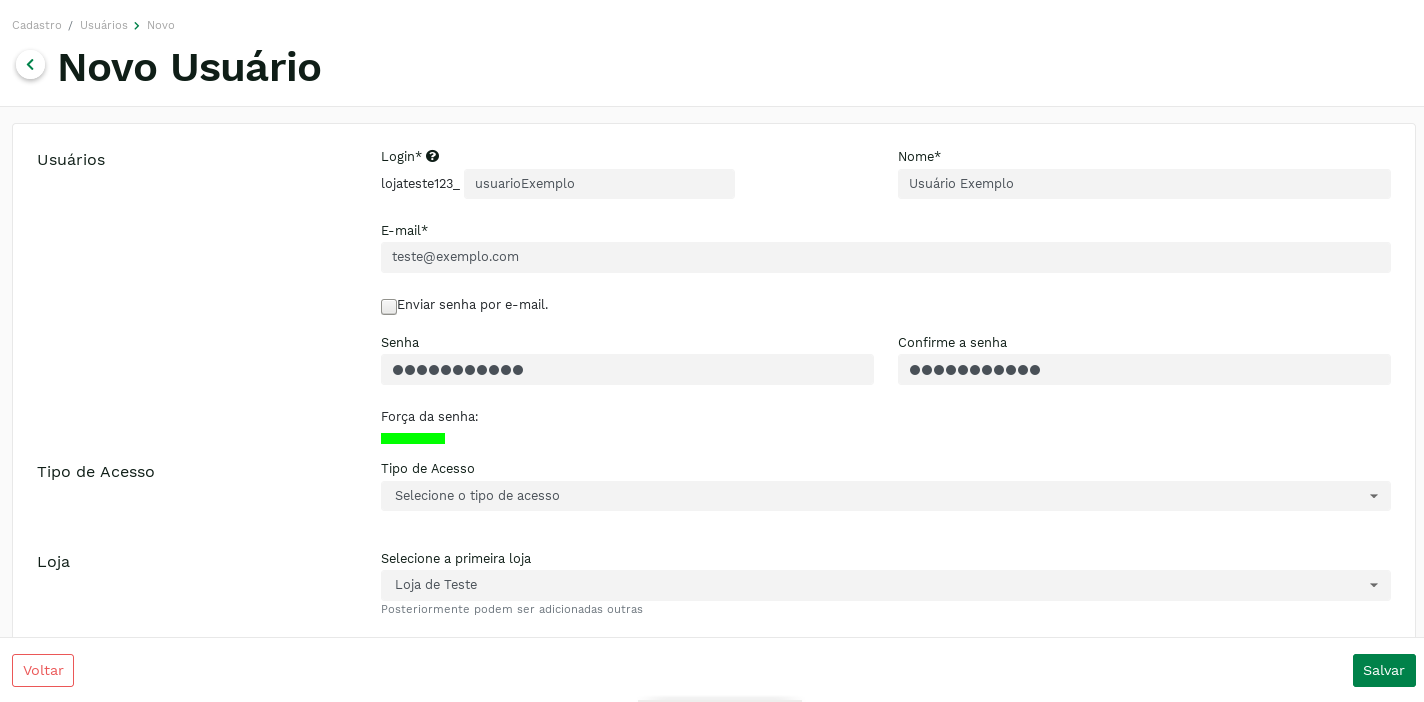
The Access Type field has two options:
- Store Web Portal: access to various reports, registration of appointments, configuration of authorizers, among other features.
- POS Virtual: making payments, recharges and cancellations, accessing transaction reports and basic settings for these operations.
Regardless of which option is checked, the page will display various options that represent each user's access permissions.
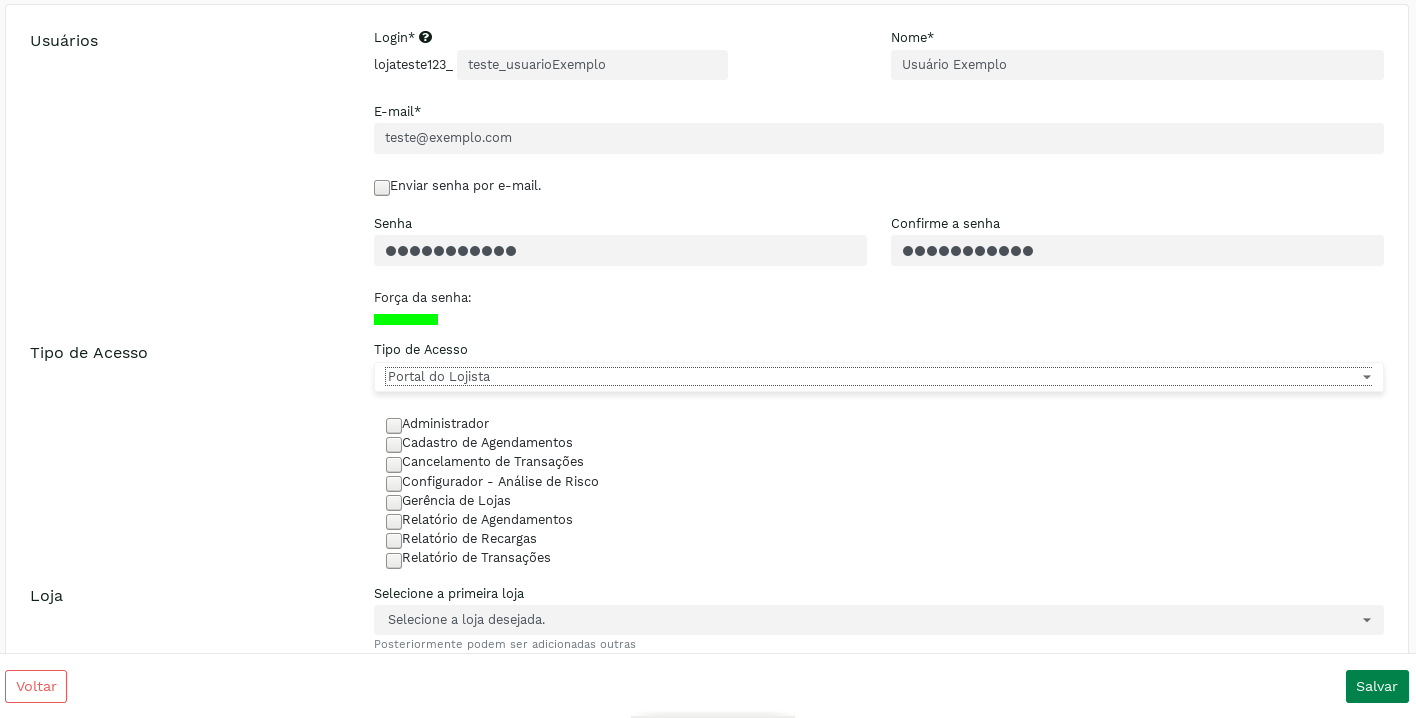
Below is a description of which features can be accessed by checking the options available for the type of access Store's Portal:
- Administrator: user administration (registration, listing and editing).
- Scheduling Registration: registration of recurring schedules.
- Transaction Cancellation: Transaction Cancellation/Reversal.
- Configurator - Risk Analysis: configuration of transactions with risk analysis.
- Store Management: configuration and ordering of store authorizers.
- Scheduling Report: Recurrence scheduling transaction report.
- Recharge Report: Recharge transaction report.
- Transaction Report: transaction report and daily summary graphs.
The profiles Transaction Report and Store Management cannot be simultaneously assigned to the same user.
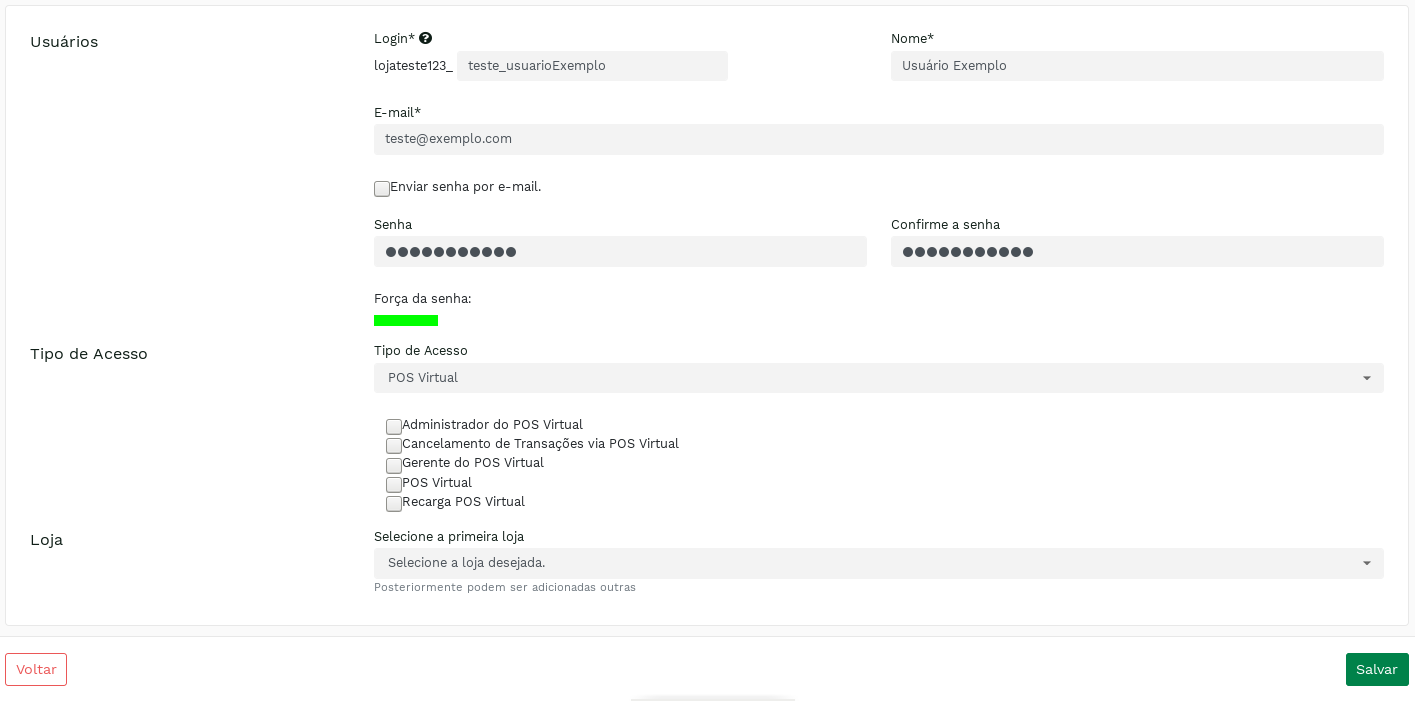
Below is described which features can be accessed by checking the available options for the POS Virtual access type:
- Virtual POS Administrator: configuration of transactions made in the Store's Web Portal.
- Transaction Cancellation via Virtual POS: Transaction Cancellation/Reversal.
- Virtual POS Manager: Daily Summary Report View.
- Virtual POS: performing payment transactions and viewing the transaction report.
- Virtual POS recharge: performing recharge transactions.
In addition to the fields presented so far, it is also necessary to select a store to be associated with the user in question.
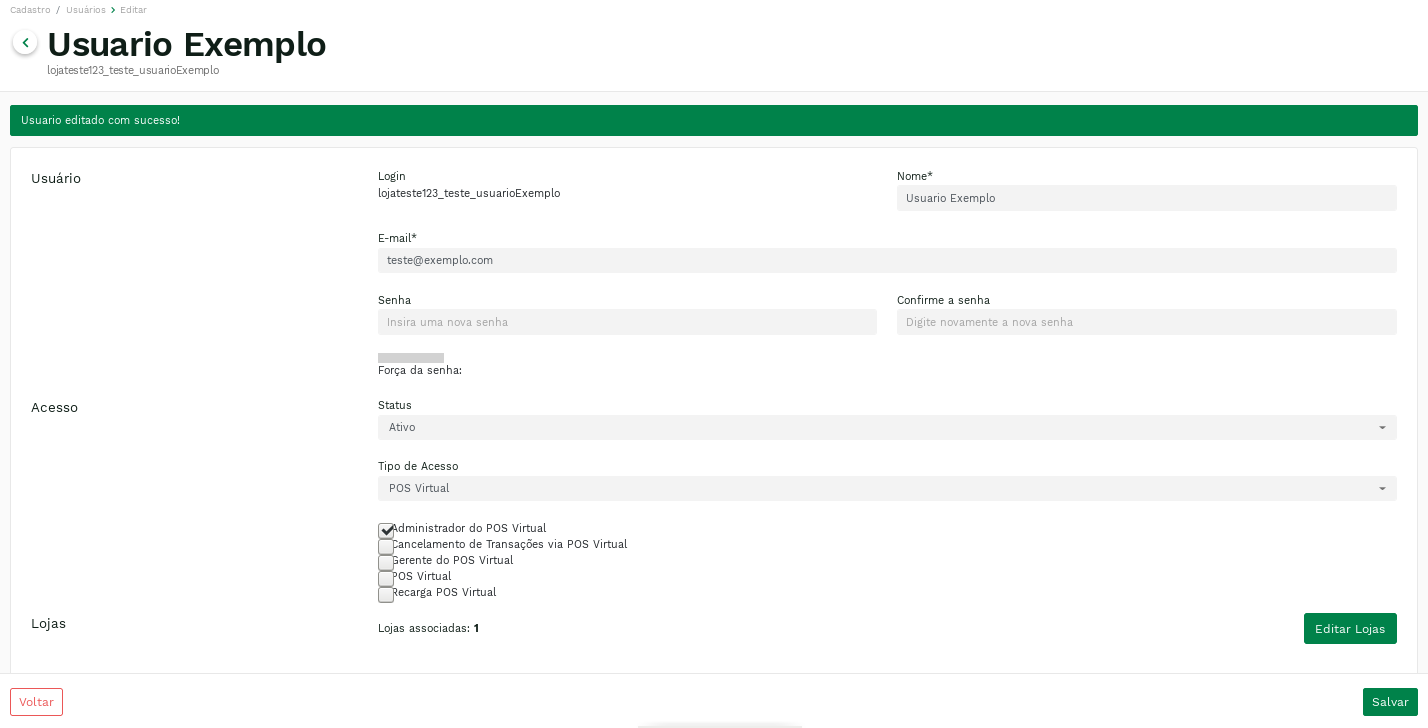
After filling in all the fields and clicking on SEND, you will be taken to the edit page of the user you just registered. In the upper left corner of the screen, a success message will be presented.
User Listing#
To access the users listing screen, follow the steps below:
- Click on Registration:

- In the submenu displayed afterwards, click on Users:

With that, the following page will be displayed:

By clicking on Buscar, the list of users itself will be performed:
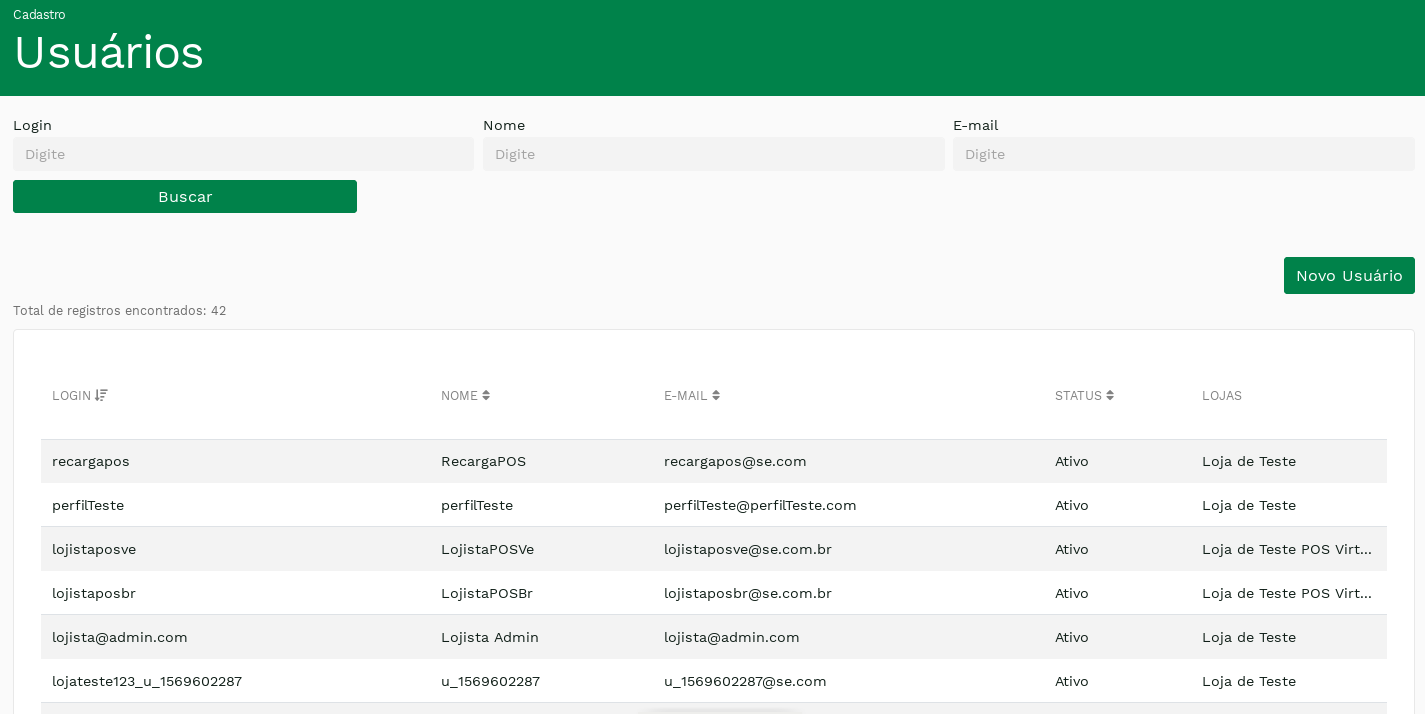
For each listing page a maximum of 20 users are displayed. To navigate among pages, just click on the arrows below the table.
It is possible to sort the results obtained by clicking on the header of the desired field.

Results can be filtered by Login, name and email. To do this, just fill in the desired fields and click on Search.
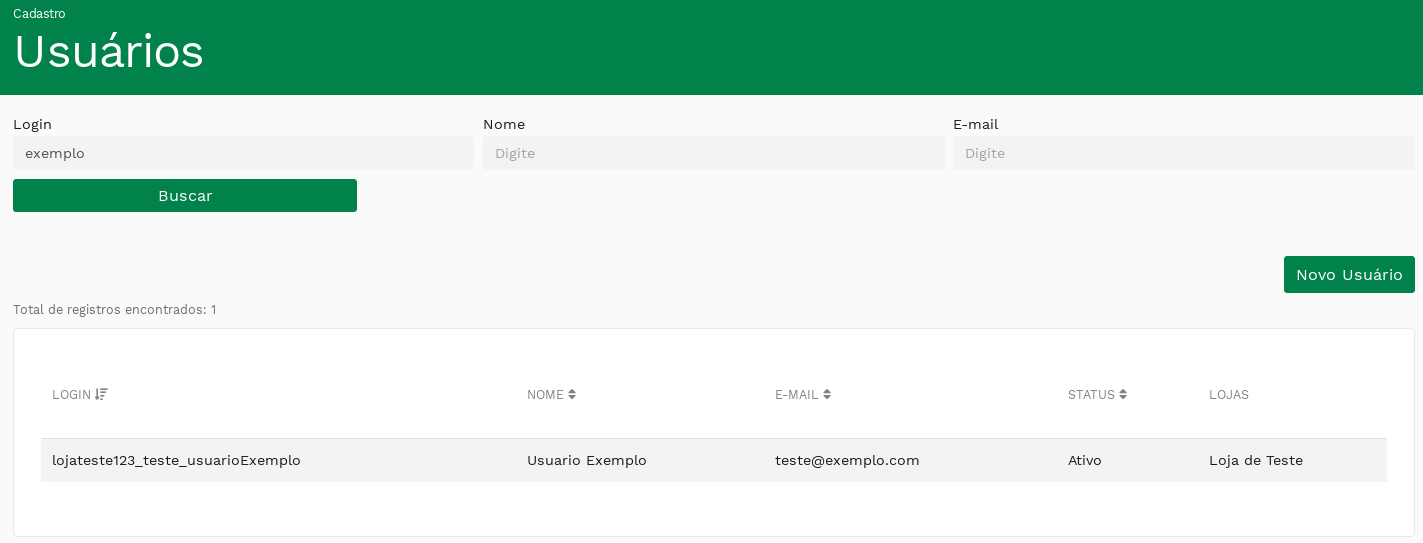
When you click on a user's login, Carat Portal will present the user's edit page.
User Editing#
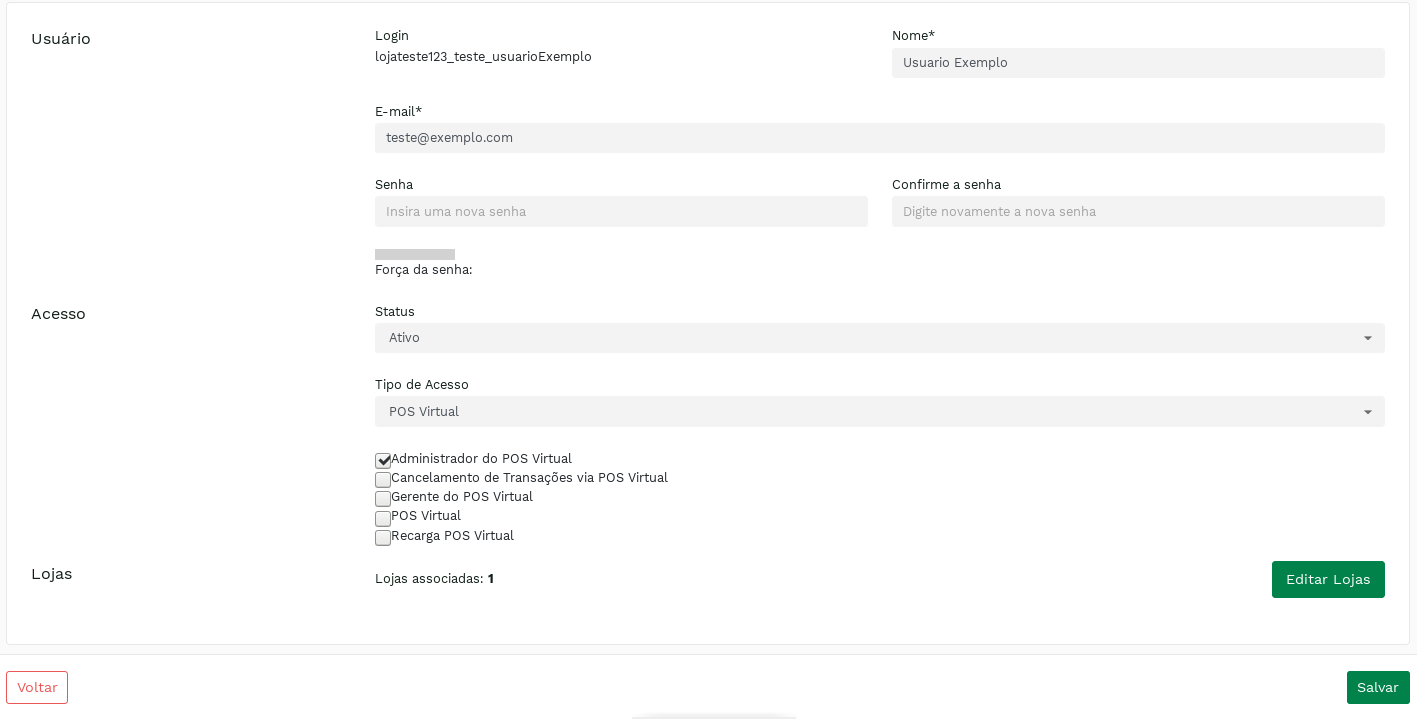
As seen in the previous chapters, you can access the user editing screen in two situations:
- Right after registering the user
- On the user listing screen, clicking on the user's login
The only difference in editing for registration is the possibility to add or remove stores, available by accessing the link Editing Stores.
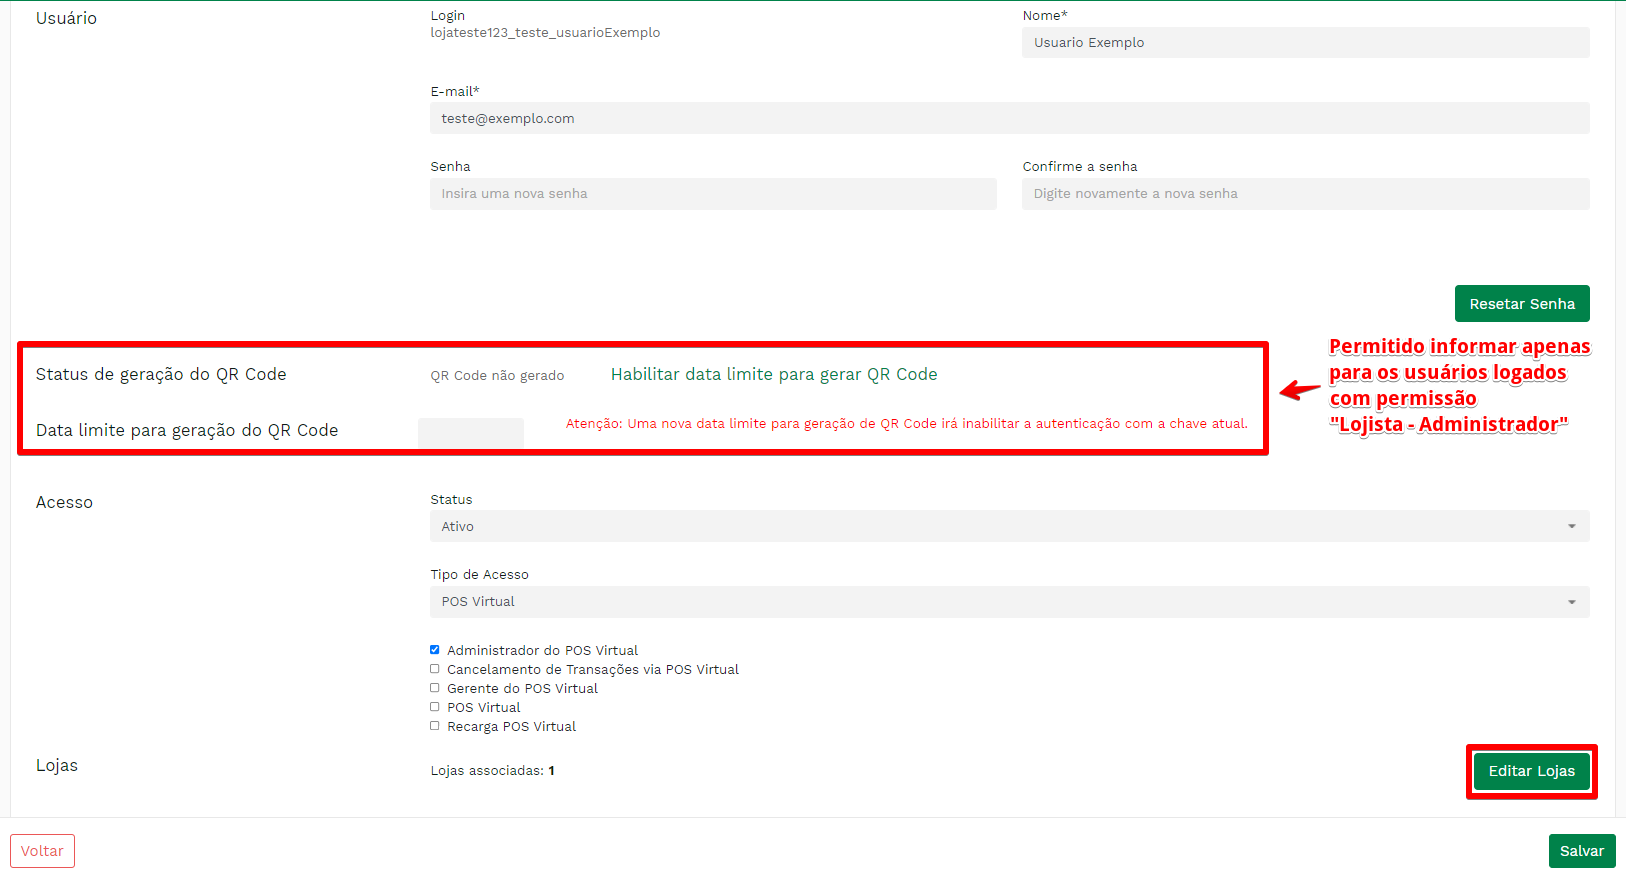
With that, the following page will be displayed:

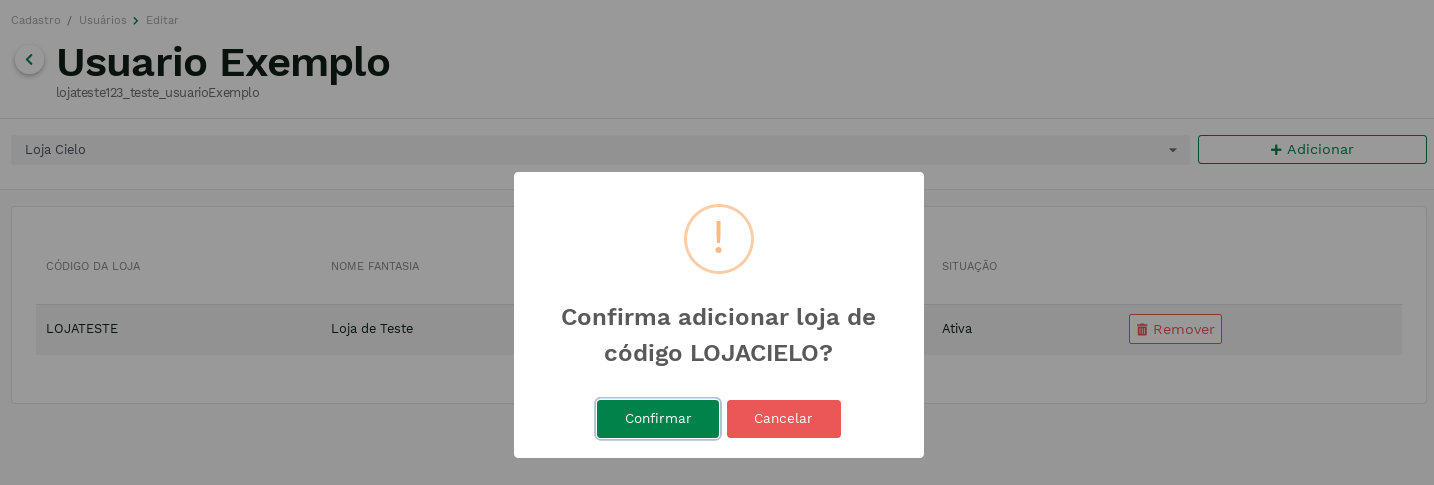
To add a store, just select it in the Available Stores field and click on ADD. With that, a confirmation window will be presented.:
When confirming the addition, the operation will be performed, and the page will display the store listing again, but now containing the new store.
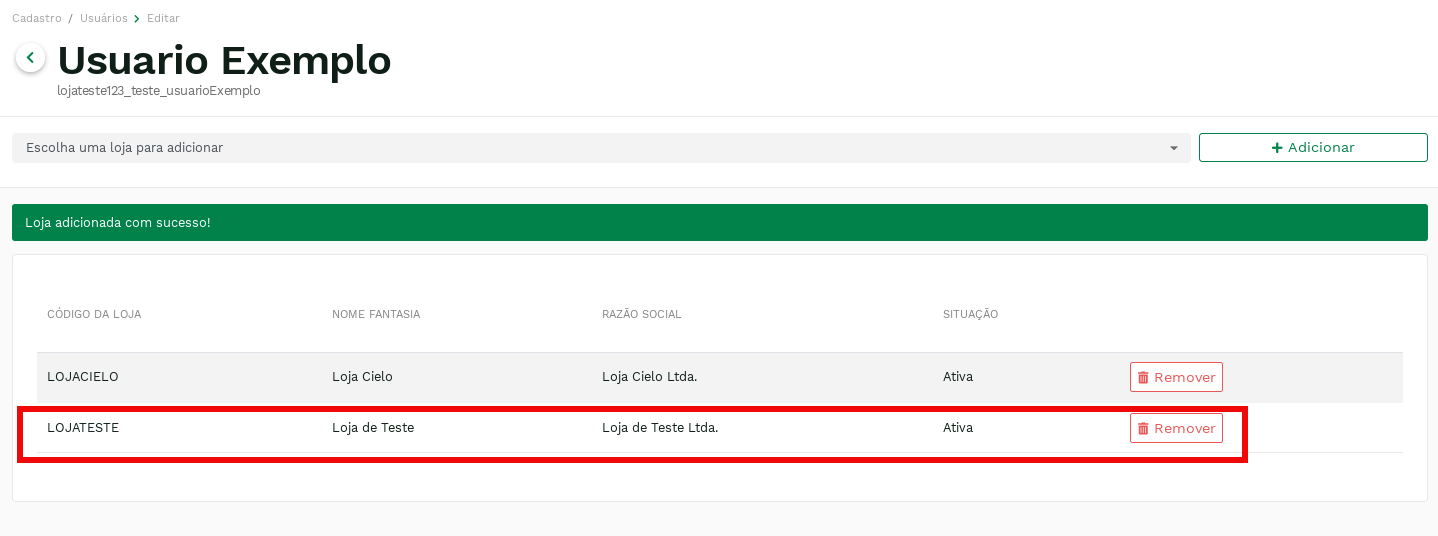
The addition of repeat stores is not allowed.
It is possible to remove a store by clicking on the link Remove in its listing.
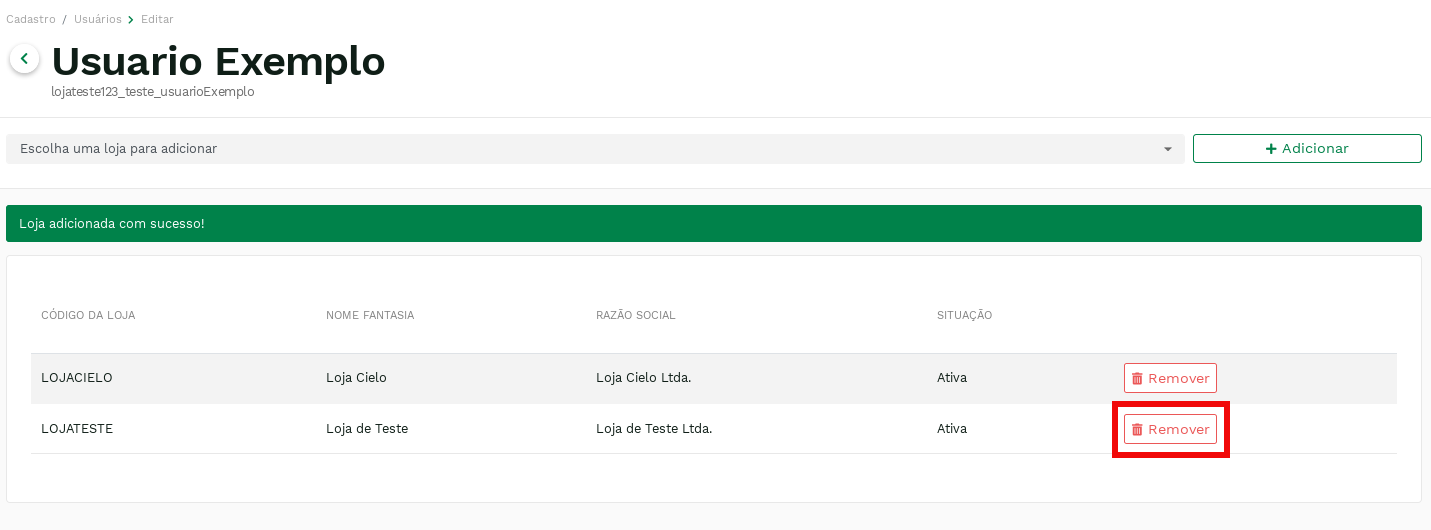
With that, a confirmation window will be presented:
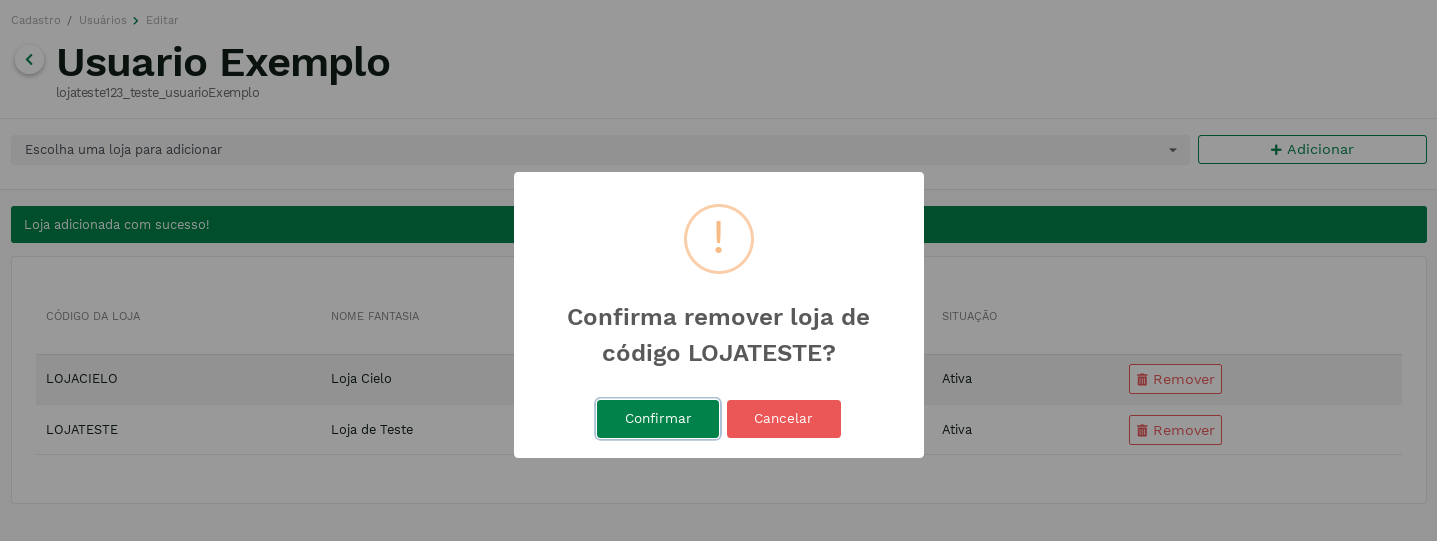
After confirming the removal, the operation will actually be performed, and the store listing will be displayed again, but without the removed store.

It is only allowed to remove stores from the user if he has at least two stores.