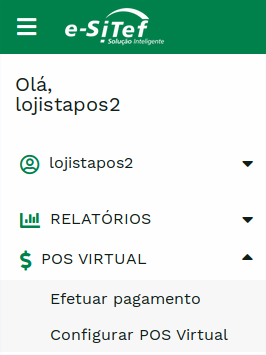
Payment via Virtual POS
To access payment functionality via Virtual POS, click on the VIRTUAL POS menu and then on the Make payment submenu as shown in the following figure:
Attention:
The user must have the Virtual POS profile to access the functionality. For further information, see how tomanage users.
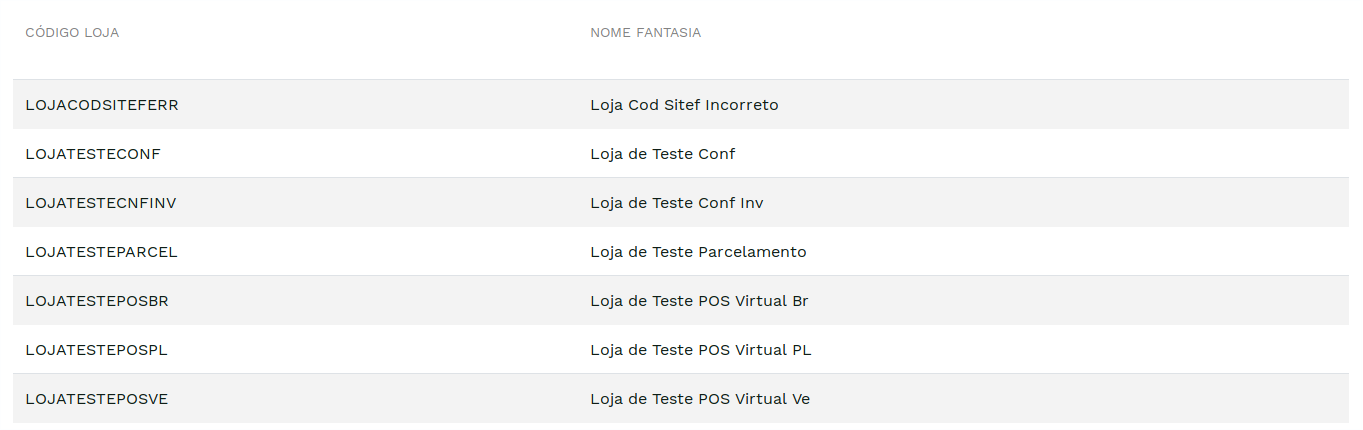
Store selection web page#
If the store has more than one registered store, the first screen will ask it to select one of them:
Attention:
If the store has only one registered store, the screen above will not be displayed.
Payment flow via Virtual POS#
Home screen#
Below is the home page for payment via Virtual POS:
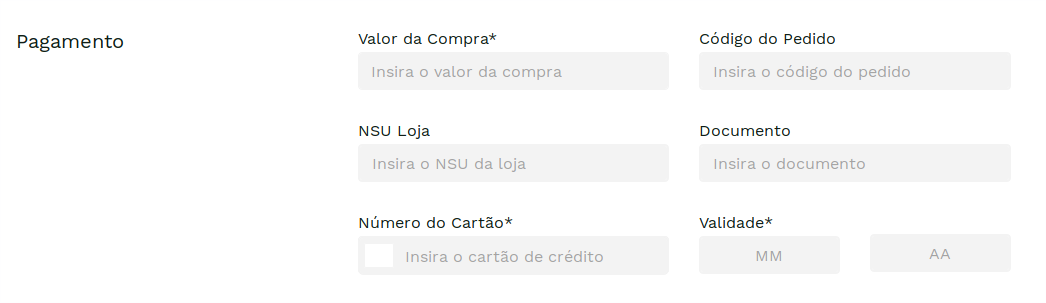
Description of fields:
| Field | Description | Format |
|---|---|---|
| Purchase Value | Purchase Value. The maximum value will be limited according to the setting. | < 10 N |
| Order Code | Purchase Order Code. It will be mandatory or not according to the configuration performed. | - |
| Store NSU | NSU (Unique Sequential Number) of the store. It will be collected or not according to the configuration performed. | |
| Personal Document | Customer's Personal Document. It will be collected or not according to the configuration performed. | < 20 N |
| Credit Card Number | Customer's Credit Card Number. Mandatory. | > 13 N e < 19 N |
| expiration date | Credit Card expiration date. Mandatory. | MM/AA |
With all fields filled in correctly, click on the Proceed button. The card lookup will be carried out.
Card lookup#
At that time, a bin query will be carried out to identify the authorizer referring to the card number sent. If there is more than one identified authorizer, the Authorizer Selection option will be displayed, as shown in the following figure:
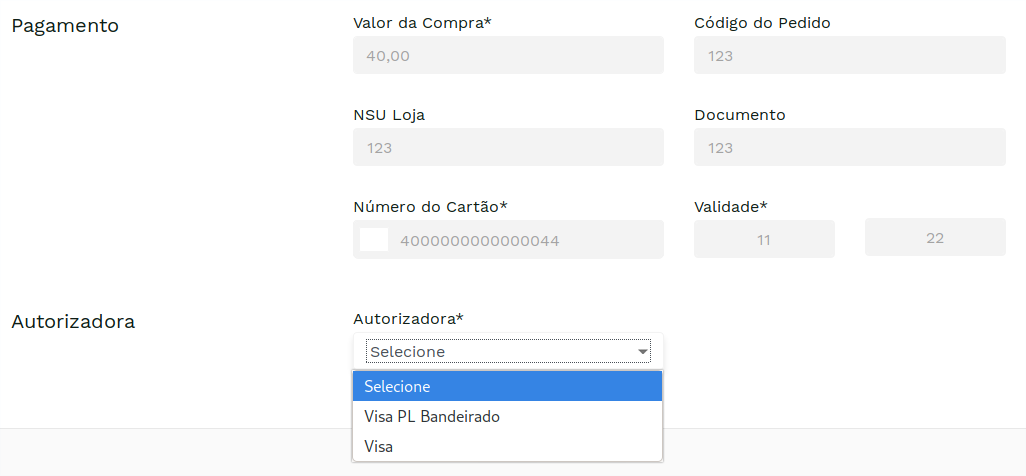
If only one authorizer is identified by querying the card number, the previous screen is not displayed, moving to the Extra Data Entry screen.
After selecting the desired authorizer (if necessary), click the Proceed button.
Extra Data Entry#
As needed, some of the following data will be requested: Security Code, Document and Date of Card Issuance. In the example below, only the security code was requested:
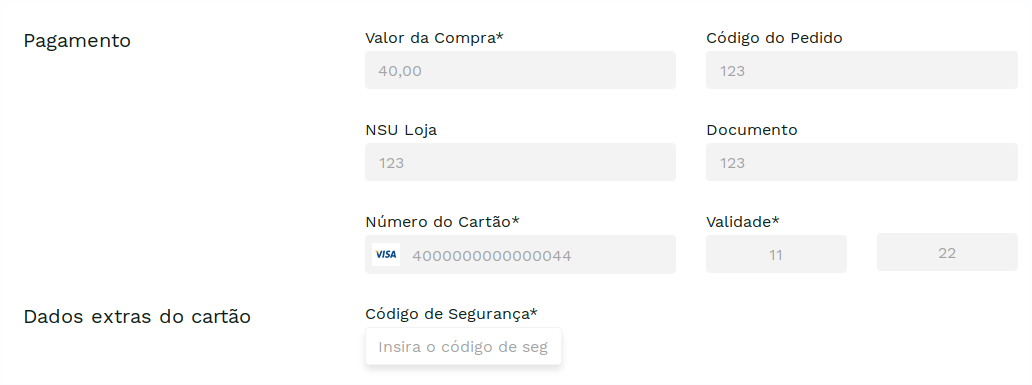
It is possible that no extra information will be requested. In this case, it will be asked directly to choose the payment installments.
###Choice of installment
The user must choose the form of installment payment and click on Proceed. After choosing, a message will be displayed to confirm the data entered.
Below, the screen for choosing installments:
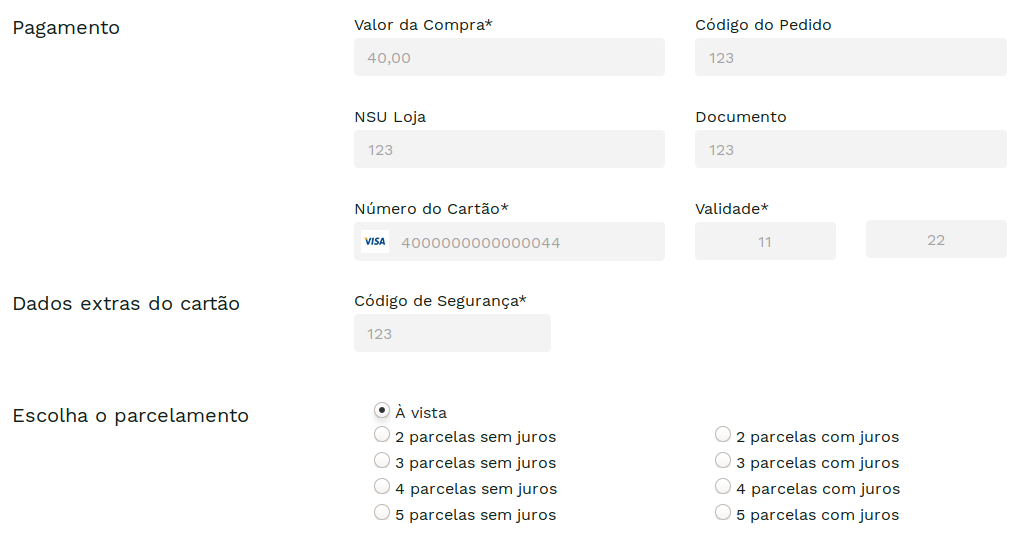
Attention:
This step will not be displayed if the store's Virtual POS is configured para bloquear parcelamentos.
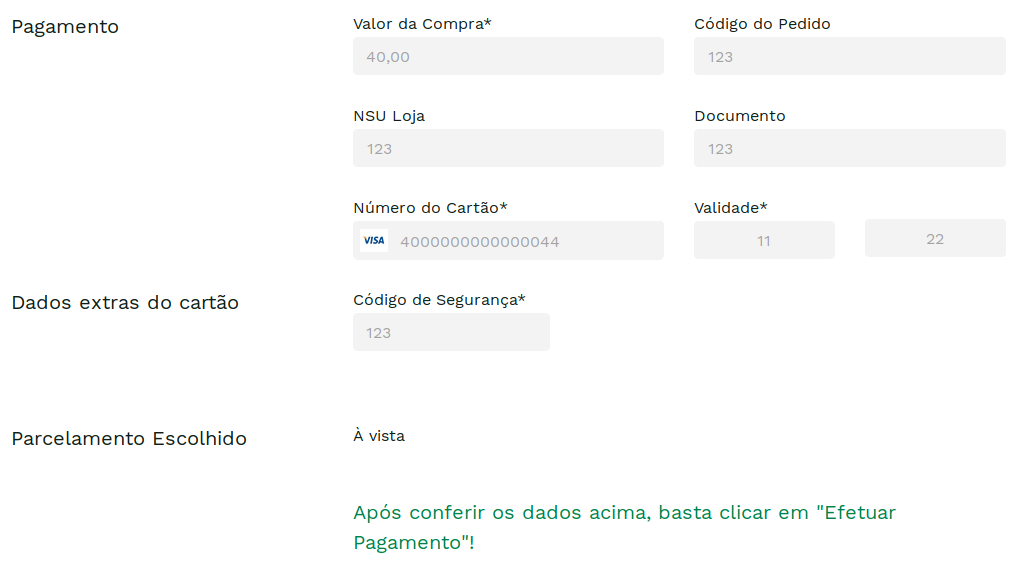
confirmation message#
After filling in all the data from the previous steps, a message for data verification will be displayed. If everything is correct, click on the Make Payment button.
Receipt Screen#
If payment is successful, the following screen will be displayed:
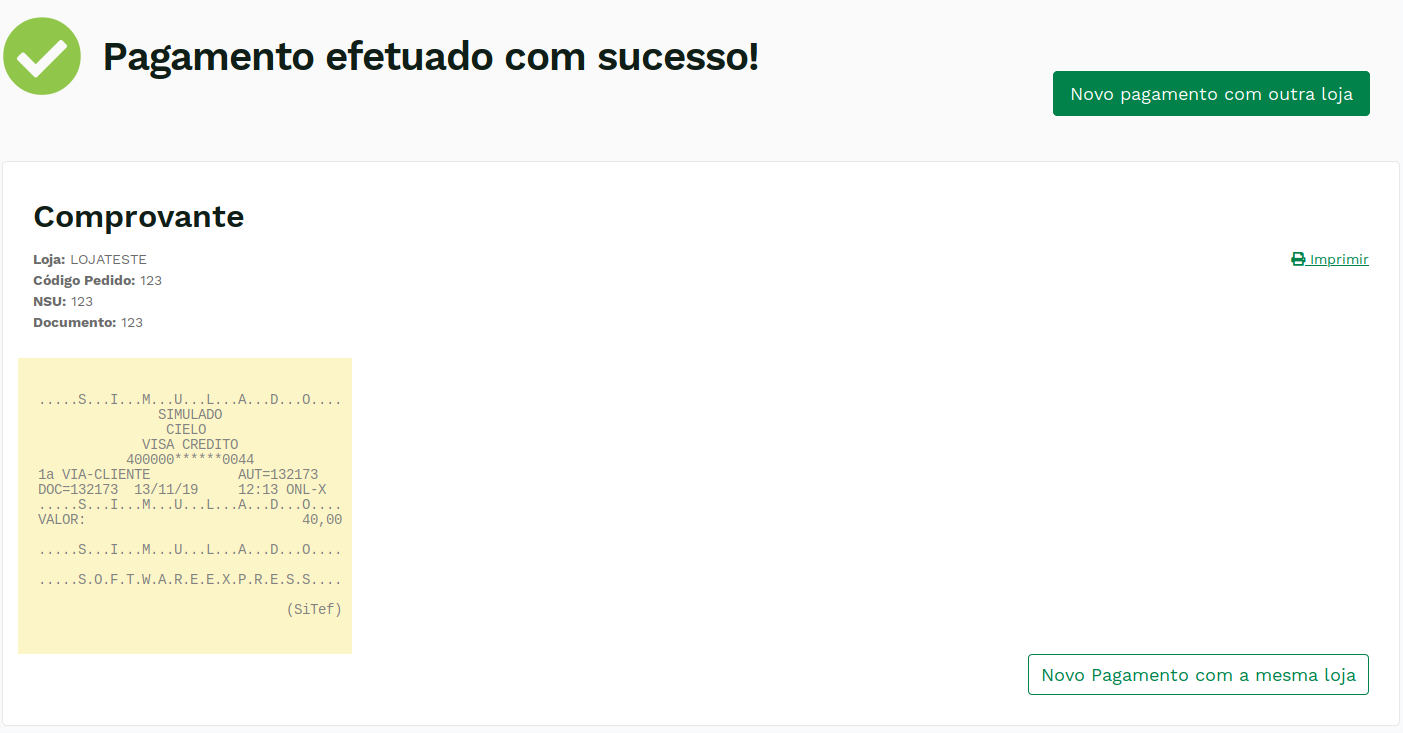
On the final screen you will be able to:
- Make a new payment with the same store.
- Make a new payment with another store.
- Print the Receipt.
Virtual POS Transaction Report#
To view the transaction report, visit the page about POS Transaction Report.
Cancellation of Virtual POS Transactions#
For more information on canceling transactions via Virtual POS, visit the page on Transaction Cancellation.